How Do I Apply Effects to Instagram Photos
Applying Effects to Instagram Photos
There are plenty of effects that can be used to edit a photo on Instagram. Instagram tries to help its users to get as creative as possible. They strive to give everyone a variety of options. People like to have fun when they post pictures.
They want to be able to create something fresh and new that shows off their unique style. Play around with all of the effects before you post your photo.
1) To get to the effects, open your app and tap on the camera icon at the bottom of the screen. Choose whether you want to upload a photo from your library or if you want to take a new one. After you’ve decided, press ‘next’ in the top right corner of the screen.
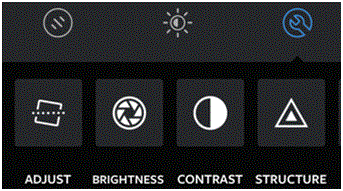
2) On the next page, you will see three icons below your photo. One of them looks like a wrench within a circle. Tap on it to see all of your effects options.
3) Below the icon, you can swipe to the left along the row of effects. You should have about thirteen options at your disposal. Tap on one of the effects like brightness, structure, fade, or tilt shift.
4) Say you want to adjust the brightness of your photo. Tap on that option. Hold the blue circle in the middle of the screen and drag it left or right along the screen. Pulling it to the left makes it darker and to the right makes it brighter.
5) Once you’re happy with the final product, press the checkmark at the bottom right corner of the screen. You will then be directed back to the effects options and you can continue editing.
Use as many of these features as you want, but make sure to press that checkmark to save it. Click ‘next’ at the top of the screen when you’re done.
Read more
- What is Instagram
- How to Create an Instagram Account
- How to Promote Your Instagram Profile using Badges
- How to Take Backup of Photos on Instagram
- How do I Edit Photos on Instagram
- How to Share Videos on Instagram
- What is Photos of You Feature in Instagram
- How do I Reset Instagram Password
- How to Enable Post Notifications on Instagram
- How do I Change my Profile Picture on Instagram
- How do I Change my Instagram Password
- How do I Copy the URL of an Instagram Photo
- How do I Delete Comments on Instagram
- How do I Delete Photos on Instagram
- How do I Rotate a Photo on Instagram
- How do I Share Photos with Friends on Instagram
- How do I Clear my Instagram Search History
- How do I Share Photos with Specific Friends on Instagram
- How do I make my Instagram Account a Private Account
- How do I Use my Instagram Account for Business
- How Do I Post a Photo on Instagram
- How Do I Take and Upload Photos on Instagram
- How do I Use Hashtags on Instagram
- How Do I Straighten an Instagram Photo
- How Do I Add a Caption on Photo Before Sharing on Instagram
- How Do I Apply Filter On Instagram Photos
- How Do I Approve Follower Requests on Instagram


