Changing Your Name on Facebook
How to Change, Update or Edit your Name on Facebook
There are a few reasons why someone would want to edit their name on Facebook. Maybe they got married, have a new nickname, or just feel like making up a whimsical name.
There are only a certain number of times that someone can change their name, so make sure not to play around with this option too frequently.
1. Click on the arrow at the top right corner of your screen. A drop down list will appear and near the bottom is an option called ‘settings.’ Click on that and you’ll be headed to a new screen.
2. This new screen has a list of tabs on the left side of it. The top one is ‘general’ with a couple gears to the left of it. Make sure to click on it if you’re not already there.
3. The top option on the ‘general’ screen is the one to edit a name. Click on the blue ‘edit’ button on the right of it and that section will expand.
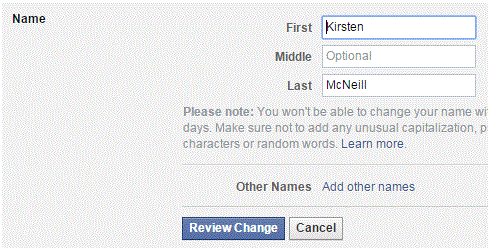
4. Type in a first, middle, or last name (or all three) into the appropriate text boxes. Once you’re done, press ‘review change’ at the bottom of the section. You can also add names by clicking the ‘add other names’ option highlighted in blue.
5. A new window will appear and you can decide how your name will appear on your profile. Click on the option you want, type in your password, and then press ‘save changes.’
The change will automatically save and now your new name will be on your profile. Make sure that you are happy with this change because you have to wait sixty days until you are allowed to edit it again.
Take some time to think about the name you want to display, because everyone is going to be able to see it. You and your friends will have to look at that name for a long time.
Read more
- My Facebook Account is disabled
- Turning off lock screen notifications on android mobile phone
- Opening Facebook Links in Your Mobile Browser
- Organizing a Contest on Facebook Business Page
- Typing Special Characters on Facebook
- How to Set the Default Video Quality on Facebook
- Saving Videos on Facebook
- How to Create Facebook Badge
- Getting the Direct Link to a Facebook Post


