How to install Ubuntu Linux Server
How to install Ubuntu Linux Server
In this step by step tutorial you will learn how to install and configure Ubuntu Linux Server. This study guide is helpful in installing Ubuntu Linux Server
Step One: Creating the Setup USB Stick
First of all we need to download UNetbootin which is a USB Stick creator for various Linux Distributions
Please download it from here: http://unetbootin.sourceforge.net/
Furthermore please make sure you have your desired Linux Distribution on your computer (whether that be CentOS, Ubuntu or Other)
Once downloaded you will need to run UNetbootin
Now you will need to select your Linux Distribution ISO file by pressing the ‘…’ button or you can request that UNetbootin downloads a Linux distribution of your choice by selecting the Distribution radio button and selecting the file to be downloaded by the drop down menus labeled “Select Distribution” and “Select Version”
Once you have selected the correct distribution you will then need to select which USB you wish to use as the install drive by selecting it from the Drive drop down menu.
Once selected press the OK button and let UNetbootin run
Step Two: Installing the Linux Server
Once UNetbootin says it is complete you can exit UNetbootin, Un-Plug your USB stick and plug it into the computer you wish to setup Linux server onto.
When you have plugged the USB stick into the computer please turn it on and keep pressing F12 or its equivalent key to enter the Boot Menu and select the USB from the list
The USB stick should boot and you may be presented with a selection screen like this: (I am installing Ubuntu Server so your screen may look a little different but it will be the same setup)
You will need to select your default language and then press enter
The Installer page,
Here you will be asked if you wish to install the Ubuntu server so just press enter
You may then be asked to select your language again
Then select your country and keyboard layout
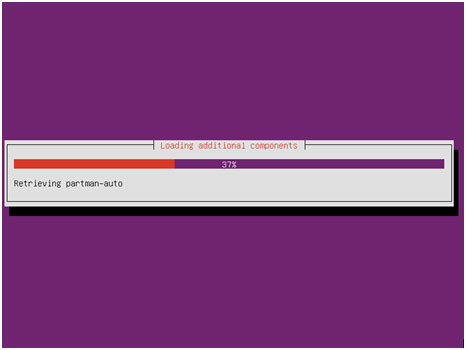
Then the installer will gather all the required files for install so please wait
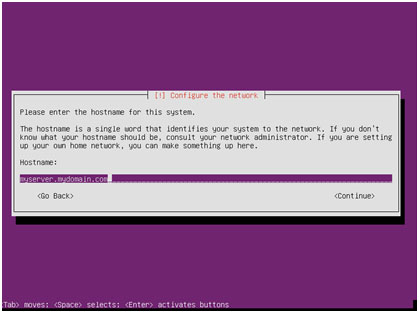
Now you will be asked to configure your servers’ hostname this is like a subdomain (example myserver.mydomain.com)
And then press the tab button until the Continue Button is select and then press enter
The next screen will ask you to set up your Username with details such as Fullname, Username and password – Confirm Password, for each one type out the required info and press enter
On the next screen you may be asked if you wish to encrypt your home directory so please select which ever option you wish
Your server will then detect the correct time zone, please confirm it and press enter to proceed
Next is the disk setup, for ease of setup sake and from the information you gave me I will presume you wish to use this computer as a dedicated server so we will Select Guided – Use entire disk and set up LVM and press enter
You will need to just select the correct hard disk on the next screen and press enter.
The Next screen will ask if you wish to proceed with installation, presuming everything is ok you can select the Yes button with the arrow keys
The next screen will ask about how big you want the drive to be, usually it will set it as the maximum so you can just press enter
You will then be given a screen that says “Finish Partitioning and write changes to disk” as an option so just press enter on that option
Then you will be ask if you want to write changes to disk so select yes and press enter
Now let the installer do its job of installing the server
The installer may ask if you are behind a proxy, if you are not just press enter, if you are please enter the proxy details and press enter
The installer will then continue with setting up the server
The server then may ask if you wish to install security and repo updates, it is recommended that you select Install security updates automatically and then press enter
The installer will then ask if you want the installer to install any other software automatically prior to first boot, for simplicity sake we will just press tab to select Continue and press enter to select no software to be installed
The installer will then ask to install a boot loader so just proceed by selecting yes and enter
The server will now tell you that install is complete and you will need to restart the system, please make sure you have ejected your usb stick and then press continue
After pressing enter your server will reboot
Once boot is completed you will be presented with a screen that looks like this
Here you will need to enter your username you set up earlier and press enter then your password and press enter, please be aware your password will not appear on the screen as you enter it.
Once you have logged in you will get the normal Linux terminal interface load up
Thanks for ordering!


