Setup Shared Folder Permissions on Windows Server 2012
Setup Shared Folder Permissions on Windows Server 2012
This article explains how to Setup Shared Folder Permissionsr on Microsoft Windows Server 2012. Free step by step tutorial or guide for Setting up Shared Folder Permissions on Windows Server 2012
Let’s get started.
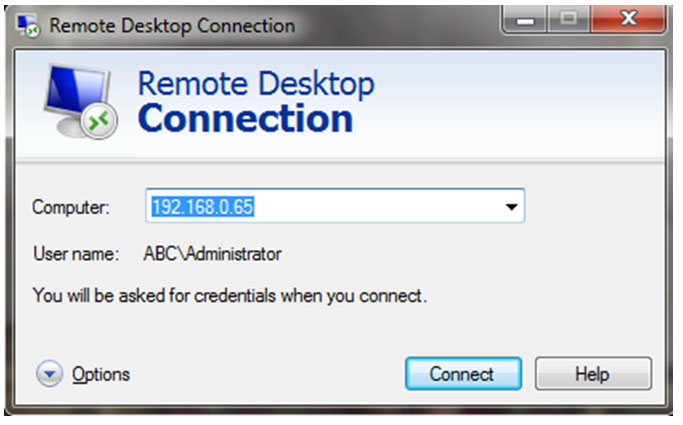
1. Login to the Test Server.
2. Now login to the server, as shown below
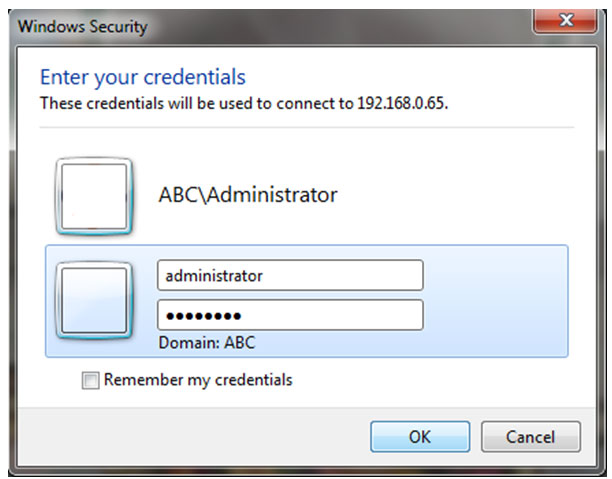
3. Enter your username and password (ABC/administrator) and click OK, as shown below.
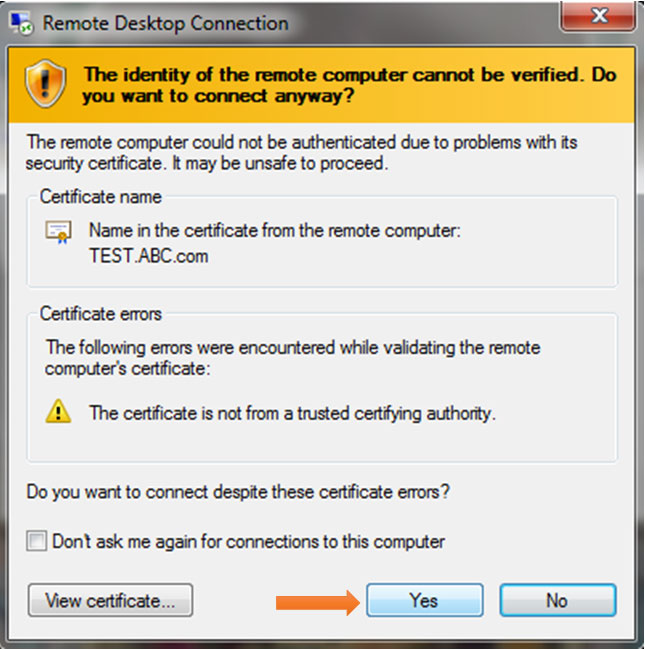
4. On the certificate verification window, click Yes.
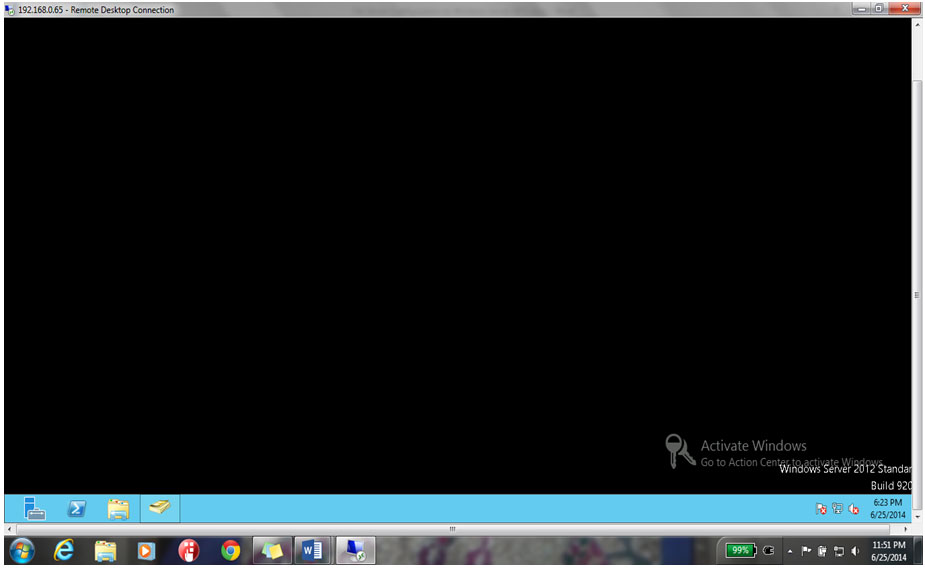
5. The next window will show the server desktop
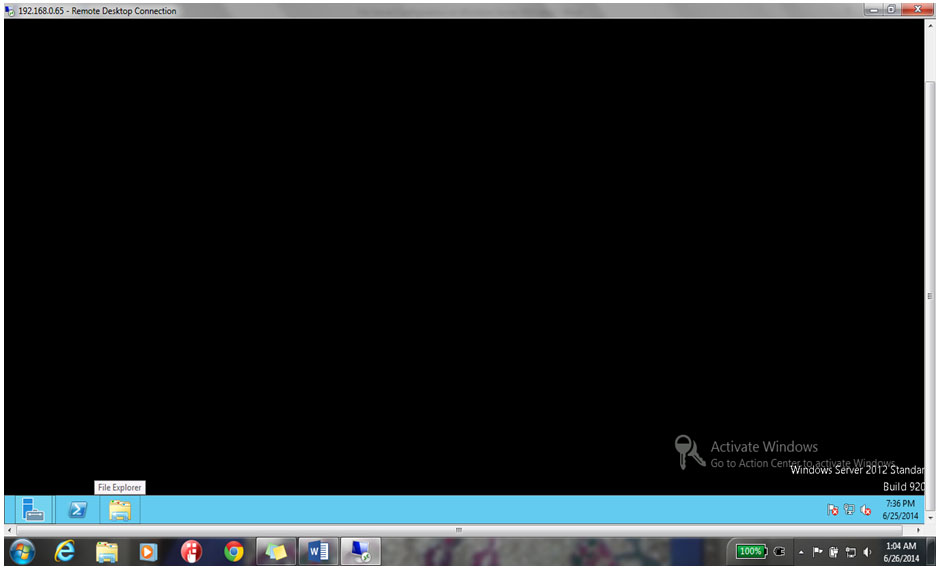
6. Open the Server Manager from the bottom left corner of the server desktop, as shown below.
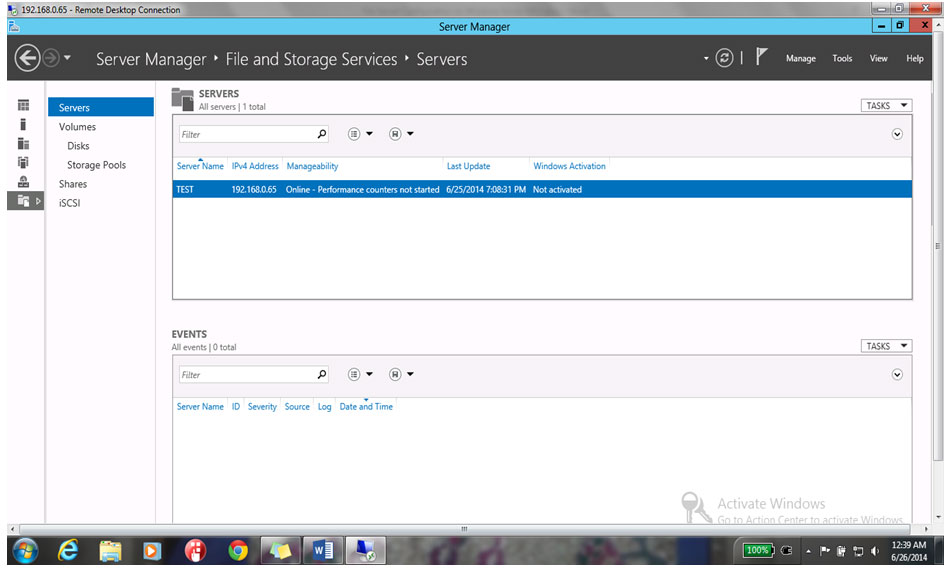
7. Click on File & Storage Services in the Server Manager Dashboard, as shown below
8. It will show you the file server details, as shown below:
- Volumes
- Disks
- Storage Pools
- Shares
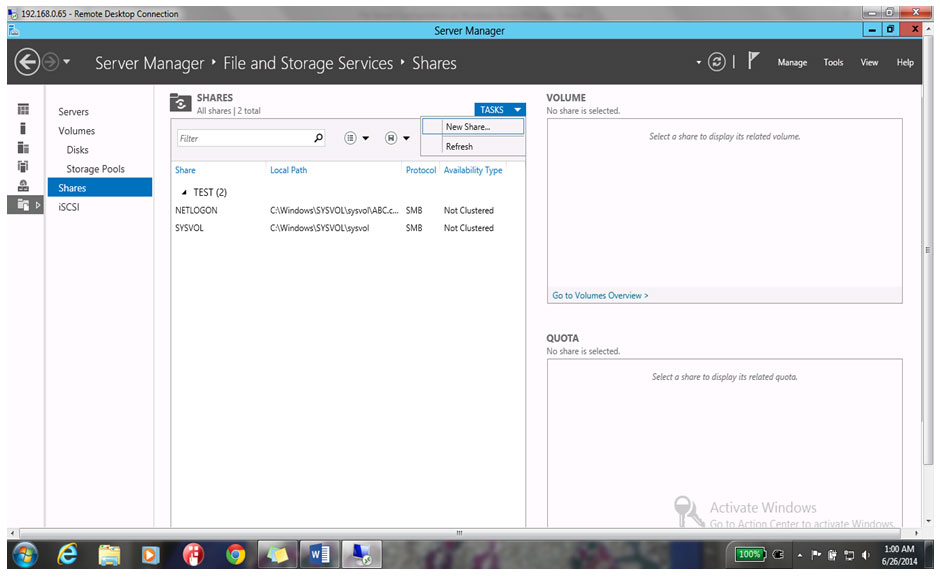
9. Select the Share option and click on Create Share from the Task button in the top right corner OR the alternative is to go to the C Drive and create a New Folder for sharing purposes, as shown below.
10. Before that, we will go to C Drive to create a folder, and name it Test
11. Then come back to the File & Storage Console.
12. Click on New Share and continue with the default settings by clicking Next, as shown below
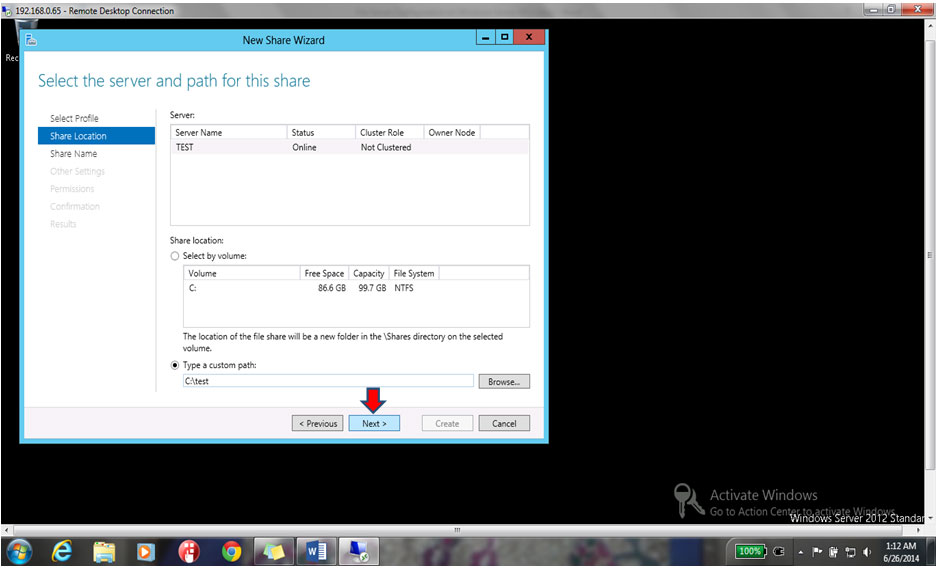
13. In the Server Path Selection folder, select Custom Path, and click Browse, as shown below.
14. Select the Test folder and click Select Folder.
15. It will come back to the location (c:\test) so click Next.
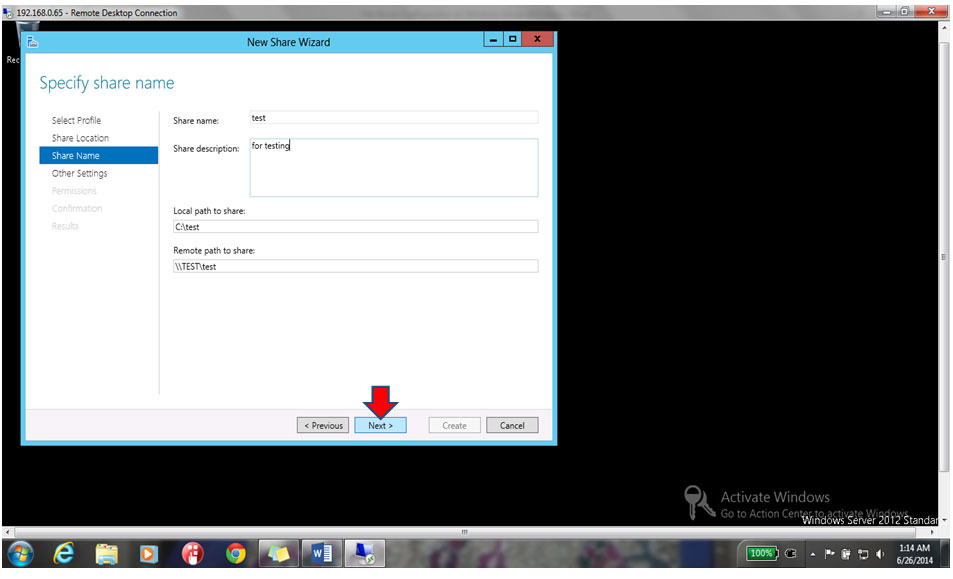
16. In the next window, click Specify the Share Name if you wish to do so – otherwise it will take the default name automatically. Click Next.
17. On the Configure Share Settings, continue with the default settings and click Next.
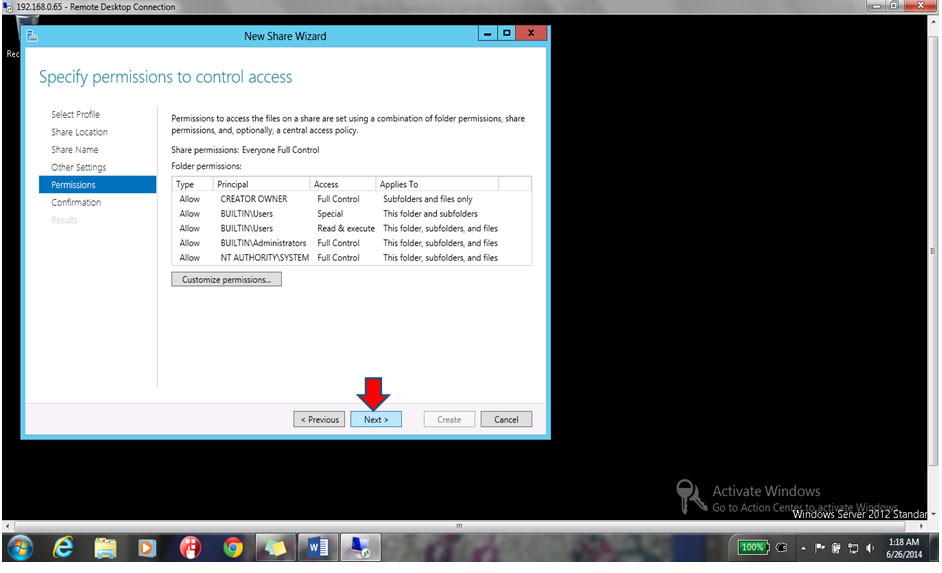
18. The next page will show the default permission for that folder. If you want to edit the permission, you can do so by clicking the Customize Permissions button, otherwise click Next.
19. On the Confirm Selection page, click Create.
20. You can see that the Share has been created
21. To verify, go to the C Drive and right-click on the Test folder, and on the Properties page, select the Sharing tab – you should see that the folder Test is now shared.
This is how we can manage folder-sharing permissions in Windows Server 2012.
Read more
- Windows Server 2012 System Requirements
- Windows 2012 Server Versions
- Installing Windows Server 2012 on Virtual Cloud
- File server configuration on Windows Server 2012
- Installing Active Directory in Windows 2012 Server
- Installation and configuration of printer server and network printer on Windows 2012 Server
- How to join Computers to a Domain in Windows Server 2012
- User Creation in Active Directory Windows 2012 Server
- How to Configure Group Policy in Windows Server 2012
- FTP Server Installation and Configuration on Windows Server 2012
- Disk Quota Management and Configuration on Windows Server 2012
- IIS Server Installation and Configuration on Windows Server 2012
- DHCP Server Configuration in Windows Server 2012
- VPN Server Installation and Configuration on Windows Server 2012
- DNS Server Installation and Configuration on Windows Server 2012
- WSUS Server Configuration on Windows Server 2012

