How do I Rotate a Photo on Instagram
Rotating a Photo on Instagram
There are plenty of effects and editing features to use when you are posting a picture on Instagram. One of those features allows you to rotate your photo. Instagram wants its users to get as creative as possible.
They want to give users as many effects and features as they can in order to make the experience that much more enjoyable.
1) Start by clicking on the camera icon at the bottom of the screen. It can be found in the middle of the five main icons.
2) Next, upload a photo from your phone’s library, or take a brand new photo. You can do that by tapping ‘library’ or ‘photo’ at the bottom of the screen.
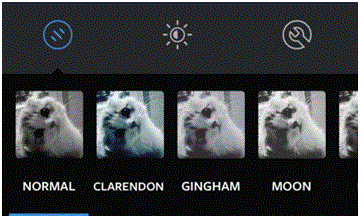
3) After you’ve selected a photo, click ‘next’ on the top right corner of the screen. You will then be directed to the screen with the filters and effects.
4) Below the photo, you will see a row of three icons. Tap the one on the far right that looks like a wrench within a circle. When you tap on it, a row of options will appear below the row of icons. The one on the far left is called ‘adjust.’ Tap on it.
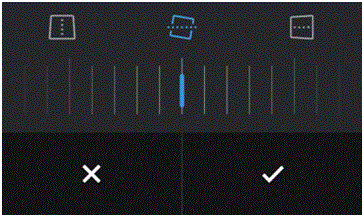
5) In the top right corner of the ‘adjust’ screen, there will be a button. The button looks like two arrows moving in a continuous circle with a diamond in the middle. When you tap that button, the picture will rotate to the upside down position. Tap it three more times to see new rotation positions.
6) Once you’ve decided which position you want the photo to be in, tap on the checkmark in the bottom right corner of the screen.
What you just edited will save and then you can continue playing around with the other editing features. Take as much time as you need to make it look perfect.
Read more
- What is Instagram
- How to Create an Instagram Account
- How to Promote Your Instagram Profile using Badges
- How to Take Backup of Photos on Instagram
- How do I Edit Photos on Instagram
- How to Share Videos on Instagram
- What is Photos of You Feature in Instagram
- How do I Reset Instagram Password
- How to Enable Post Notifications on Instagram
- How do I Change my Profile Picture on Instagram
- How do I Change my Instagram Password
- How do I Copy the URL of an Instagram Photo
- How do I Delete Comments on Instagram
- How do I Delete Photos on Instagram
- How do I Share Photos with Friends on Instagram
- How do I Clear my Instagram Search History
- How do I Share Photos with Specific Friends on Instagram
- How do I make my Instagram Account a Private Account
- How do I Use my Instagram Account for Business
- How Do I Post a Photo on Instagram
- How Do I Take and Upload Photos on Instagram
- How do I Use Hashtags on Instagram
- How Do I Straighten an Instagram Photo
- How Do I Add a Caption on Photo Before Sharing on Instagram
- How Do I Apply Filter On Instagram Photos
- How Do I Apply Effects to Instagram Photos
- How Do I Approve Follower Requests on Instagram


