How do I Edit Photos on Instagram
Editing Your Photos on Instagram
When you’re preparing to post a photo on Instagram, one of the most exciting things to do is to edit it. You can make the photo look exactly how you want it to. You can add filters, effects, and so much more. If you want to show off your creative side, play around with the different effects until you find one that works well with the photo.
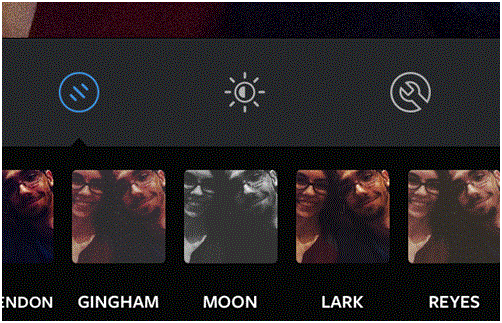
1) After you’ve taken a photo or selected one from your photo library, you are ready to edit. Below the photo, there will be three icons in a row. Each icon lets you edit different aspects of the photo.
The first one, on the far left, looks like a circle with three lines in the middle. This is where you decide which filter you want to use. Tap on that feature and scroll to the left through the options that show up on the very bottom.
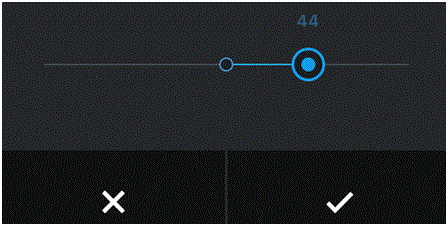
2) The middle icon looks like a sun that is not completely shaded it. This is where you can adjust the lighting of the photo. Hold that large blue dot with the circle around it and drag it from side to side along the line. Adjust the saturation of the photo, and once you’re happy with what you see on screen, press the checkmark on the bottom right corner.
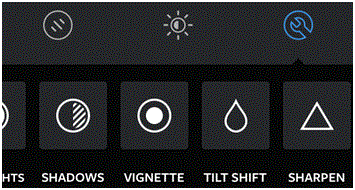
3) The final icon looks like a wrench within a circle. This is where you can adjust a range of features in the photo. Fix up the brightness, contrast, tilt, color, highlights, and more. You should have about thirteen options to play with, so take your time and get creative!
These are your photos, so you have the right to do whatever you want with them. Instagram gives you plenty of options, so take advantage of them. Have fun with the effects at your disposal.
Read more
- What is Instagram
- How to Create an Instagram Account
- How to Promote Your Instagram Profile using Badges
- How to Take Backup of Photos on Instagram
- How to Share Videos on Instagram
- What is Photos of You Feature in Instagram
- How do I Reset Instagram Password
- How to Enable Post Notifications on Instagram
- How do I Change my Profile Picture on Instagram
- How do I Change my Instagram Password
- How do I Copy the URL of an Instagram Photo
- How do I Delete Comments on Instagram
- How do I Delete Photos on Instagram
- How do I Rotate a Photo on Instagram
- How do I Share Photos with Friends on Instagram
- How do I Clear my Instagram Search History
- How do I Share Photos with Specific Friends on Instagram
- How do I make my Instagram Account a Private Account
- How do I Use my Instagram Account for Business
- How Do I Post a Photo on Instagram
- How Do I Take and Upload Photos on Instagram
- How do I Use Hashtags on Instagram
- How Do I Straighten an Instagram Photo
- How Do I Add a Caption on Photo Before Sharing on Instagram
- How Do I Apply Filter On Instagram Photos
- How Do I Apply Effects to Instagram Photos
- How Do I Approve Follower Requests on Instagram


